We use LoveFilm, and have a 3 months free trial offer for anyone to take up in the UK.
go to: www.Lovefilm.com/freegift
Put in gift code: XMLF711
Enjoy!
Merry Xmas, see you in the New Year
Saturday, 22 December 2007
DVD Offer
Posted by
craftyclaire
at
02:59
0
comments
![]()
Friday, 21 December 2007
Fairy Toadstool Cake, Not So Easy
In my wisdom I decided to make from Debbie Brown's 50 EASY Party Cakes, the Fairy Toadstool for my 2 nieces for Xmas. With my classes I felt a bit more confident with my newly learnt skills! I should have realised that EASY is just a word to make you buy the book!!! Afterall, it was my husband who rescued the dinosaur cake, from the same book a few years ago.
Anyway, the cake board went v well. This I was pleased with.
Then I coloured my sugarpaste/ rolled fondant. This too went well. The blue is extra large, as I over coloured my small ball, and had to add more white to tone it down.

Next I made the fairy bodies, still going well

Then I rolled out all the other pieces, still ok.

Buttercreamed the cake. OKish

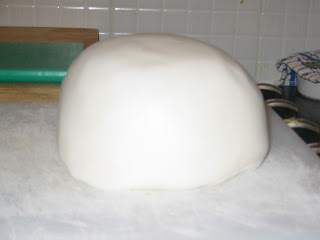
Covered base in white regalice, okish. Underneath cake, not smooth enough purhaps?

Did top, but Debbie says to hollow out the top, but does not show a photo, so I wasn't sure how much. I think I should have cut more out, to get the top to fit more snugly on, and therefore look better.
Posted by
craftyclaire
at
07:27
6
comments
![]()
Labels: bake and do, sugarcraft
Sunday, 16 December 2007
Sugarcraft or Cake Decorating Dictionary
Is it Sugarcraft or Cake Decorating? That is just the start of the problem!!!
I've noticed that there seems to be many names for the same product, which makes things quite confusing for a beginner like me. So I'm going to attempt in this post (and will update as I learn more) to clarify things. If you know of a product to add to this list, please post a comment or if I've made a mistake, which wouldn't be surprising, then let me know. Thanks.
The one thing I would say, is that some products contain gelatin (so if you are veggie watch out and try different makes)
Clearly, as so many of the pastes do simlar jobs, it's going to be down to a matter of personal taste which ones to use. In my class we use Regallice to cover cakes, flower paste for the sugarcraft flowers and mexican paste, when we need something to be stronger and dry rock solid.
1. Rolled Fondant/ Sugar Paste/ Regallice - all the same product. You can make your own or buy ready made - widely available in Supermarkets
2. Flower Paste/ Petal Paste/ Gum Paste - from specialist cake decorator shops
- This rolls out very thinly to help create very realistic flowers, dries hard. Can keep for a very long time.
- Dries rock solid, used for the snowflakes I made, also plaques etc. Quite rufty-tufty! (Doesn't break too easily)
- Dries hard (can be used instead of Mexican Paste)
- Dries extremely hard, not affected my heat and moisture the way other pastes are.
There are recipes for all of the above pastes in various books and on the net. Some may be easier to recreate than others.
Posted by
craftyclaire
at
14:01
3
comments
![]()
Labels: sugarcraft
Friday, 14 December 2007
Glutney and Pirates
Quick knitting update, I've not done quite as much as I would have liked, but I do a few rows every day. This is the back of the jumper btw. Luckily I have 2 years to complete this in.
Posted by
craftyclaire
at
08:28
0
comments
![]()
Labels: bake and do, knitting, make and do
Thursday, 13 December 2007
Christmas Cake
 This is the cake I made at my cake decoarting class. My teacher's design, but I'm pleased with the overall effect. I chose the snowflakes on the side. The board needs a ribbon and then it is done.
Posted by
craftyclaire
at
06:42
7
comments
![]()
Labels: bake and do, sugarcraft
Wednesday, 12 December 2007
Snowflake Sugarcraft Tutorial
Sugarcraft Snowflakes
Materials/ Equipment Needed:
1: Smooth rolling board
2. Smooth rolling pin
3. Vegetable oil
4. Mexican Paste
5. Snowflake Cutters (by patchwork cutters)
6. Edible glue (from Sugarcraft shops)
7. Edible Glitter (from Sugarcraft shops - I used Disco WhiteHologram made by Edable Art)
8. Cocktail stick
Step 2
Choose a cutter and grease it with vegetable oil.
The set of cutters I bought came with 3 different sized snowflake cutters.
Step 3
Cut out snowflake. Press down very firmly and I gently jig it about.
In this picture, I have also made a tree, that wil be decorated at my evening class tonight. I'll post photos of the finished product.
If I have missed anything out or you found this helpful, please post a comment. Thank you.
Posted by
craftyclaire
at
01:49
5
comments
![]()
Labels: bake and do, make and do, sugarcraft
Saturday, 1 December 2007
winter felt garland
My son and I made this winter garland the other day. He chose the things to hang on it, I drew them, he cut them out, I recut them out (unfortunately the boy's foot was severely cut and beyond repair) and then thread them onto ribbon and hung up. (We also added fabric glitter to the snowflakes - the shops were out of the glittered felt in white).
I like this idea, simple yet v pleasing. It hangs next to the Autumn garland we made.
Posted by
craftyclaire
at
14:49
1 comments
![]()
Labels: make and do


