Tuesday 25 November 2008

Xmas Trees

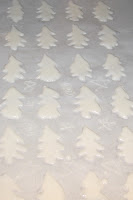
This is a tricky thing to make (as they are very delicate and like to break!) However if you can do them, they look great. Make them c3 days before you need them, as they need that time to dry out fully.

This is from Peggy Porschen's Pretty Party Cakes book.

You will need:
Trex
Royal Icing
Piping bag
Ed Able art Hologram Glitter (I'm addicted to this stuff!)
Greaseproof Paper/ Baking Parchment

1. Draw out your tree designs on some white paper.
2. Place your non stick paper over tree designs, you should be able to see your design through the paper.
3. Very lightly grease the paper
4. Mix some Royal Icing to a soft peak stage and put in an icing bag. Cut end off icing bag to give a smallish hole.
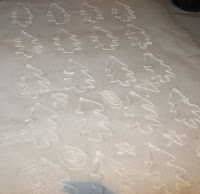
5. Start piping outlines of trees

6. Mix up some more royal icing to a runny consistency (or if you have the soft peak mixture left add mor water to give you a runny mixture). Put in a new icing bag.
7. Carefully fill your tree outlines.
8. Shake your edible glitter over the wet trees.
9. Now leave to dry in a dry and warm place. DO NOT TOUCH for at least 2 DAYS, so they can dry out fully.
10. Very carefully ease off paper (this is where they tend to break)
11. Add to small cakes! (pictures of this will hopefully appear at the weekend when I have made my cakes!!! As long as trees do not snap!)

Monday 24 November 2008

Favourite New Thing

The one thing I really wanted from Cake International was this amazing silicon flower mould from Sunflower Sugar Art. It was not cheap, £17.50, but I can see I will use it a lot.


One of the best things is that you can make flowers from Flower Paste and they can be stored in a cardboard box for years!

I first saw this veiner on Cake Journal's site, which is a wealth of information. In fact she must spend a long time looking through websites and buying amazing cutters etc which she shares very kindly with everyone else.

A Quick How to Use the Flower Veiner

1. I dyed some flower paste purple with Wilton food dye (I either use Wilton or Sugarflair colours, both are vegetarian) and pink colouring.
2. Roll out flower paste thinly. (I dusted my board with corn flour first)
3. Cut out the flower with the 5 petal blossom cutter
4.I dusted down the veiner with corn flour, lay your flower in the veiner, push the top of the veiner down and then remove top and gently lift out your flower using a cocktail stick, gently easing each petal back one at a time.
5. I lay it on a paint palette to keep the 3-D shape as it dries. I will pipe in a middle dot and then they can be attached to cupcakes, cakes etc. A calyx could also be added.I used different size and shaped cutters to get some different looks.
For these tiny flowers I used blossom cutters, to create the bent shape just push them out onto a foam pad and they naturally curl up.

All flower paste flowers can be kept for years in a cardboard box, so I've made lots ready to be placed on cakes for special occasions and school cake sales!

Friday 21 November 2008

Cake Shows Across the UK in 2009

I found this site listing a lot of them!

Plus the one I just went to in Birmingham at the NEC in November.

It's a good idea to keep track of the one you want to go to, as the tickets for demonstrations and workshops sell out very quickly!! As soon as they release the tickets buy them!!!

Wednesday 19 November 2008

Cake International Part 2

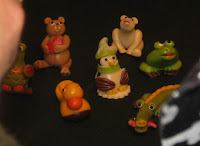
Bart van Vliet from Holland, was the second demonstration I saw. He was doing an animal parade from Marzipan.


He runs a bakery and around now he starts making 1000s of marzipan animals to sell!


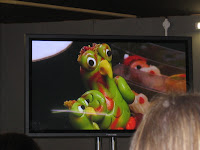
He was very quick at what he did and did not go into a step by step detail but I did write down some instructions and I'm hoping from looking at the photos I can work out what he did! What I liked about the demonstrations was that they were videod and put up on 2 large tv screens so you could see exactly what they were doing.


More animals


His stall
His windmill from Amsterdam!
Lots of lovely marzipan animals, I might be able to make the duck!
Unfortunately Bart does not have a book, but I noticed that Ann Pickard did!

Monday 17 November 2008

Cake International 08 - Part 1

On Sunday I went to the Cake International Show at the NEC in Birmingham, UK. This is the first time I've been to this and was really pleased with the exhibition and the demonstrations and the competitions, plus all the stands selling and demonstrating their wares! I kept my spending in check but did get a few key items that I wanted. (I sensibly went with a shopping list!) But believe me I could have spent £100s!!!!

The first demonstration I went to was by Ann Pickard, from the Icing Centre. She writes the Idiots Guides and has DVDs as well!

Her demonstration was a Wedding Cake and Bride and Groom Toppers. She was so clear, and did it in a step by step way. Absolutely fantastic. She showed everyone how to do a draped cake. Which she made look so simple and gorgeous.


She dusted the drape with a satin shimmer and piped on some extra flower detail.

She then went on to show us these Bride and Groom toppers. She made it look so straightforward!!! I think they look really sweet! I went to a wedding with Bride and Groom toppers and they were made to look like the actual couple, so they are a really sweet idea.
Although most of the weddings that I have been to have not had toppers on their cakes.

After her demonstration finished, I went round to her stall and bought her modelling DVD for people, and she was giving away with DVD sales a book and some regalice models as well! Very generous of Ann. If you are ever at a cake fair and she is doing demos I would recommend that you go to one!
I have lots more to say about the Cake Show, but that will be in another few posts!

Tuesday 11 November 2008

Sew Hip


Sew Hip is a brank new UK based modern sewing magazine! Hooray!!!

Contents

I was looking forward to reading it, as there is nothing else like it over here. There were some lovely patterns (2 gorgeous quilts) a lovely outfit for a little girl and some cool hand printed cushions.

Girls' Blouse


Charm Pack Quilt

On top of that interviews with Alicia Poulson (Posie Gets Cozy), Amy Butler, Prints Charming, Sandi Henderson and Janet Clare - so a lot of international interviews, hopefully they will interview more British people to showcase British designers and producers.

Beautiful Prints Charming Heart Quilt

Amy Butler Interview


The disadvantage of this magazine is the web and you can get a lot of stuff off the web, so to me it didn't feel as fresh and new as it should have. But I think if you don't read blogs it would be a revelation.

Next month they are doing some stuff for boys and I suspect Xmas, so I'll buy it again. The thing is the price of 2 to 3 issues would buy me a lovely book!

I emailed the editor, Manda McGrory and asked if they would be putting in some other features such as technique masterclasses and promlem solving etc, she very nicely and promptly replied and said yes they will be! I will definitely get it for the next few issues and see how it develops, but it is a welcome addition to the rubbishy old fashioned "craft" magazines that exist.

Monday 10 November 2008

summer in a jar

Yesterday I made 2 jars of lemon curd (today we are down to 1 last jar!) I love love love lemon curd. It really is good enough to eat out of the jar!

The recipe I used goes like this:

100g butter
3 lemons - grated zest and juice of
3 eggs plus one egg yolk - beaten together
225g granulated sugar

In a double boiler pan (ie a pan of boiling water with a pyrex bowl on top) put:

100g butter - let that melt.
Then add the rest of the ingriedients. Give them a stir and let cook over the boiling water until thickened to cover the bak of a spoon. Never let the mixture boil. This does take 30-50 mins (I lost track of how long it took as I was listening to the radio!)

Put in sterilised jars (2 jam jars will do) It makes c 550g of lemon curd.

I think I'm going to have to make some more!

Monday 3 November 2008

hearts and stars

There could be a theme:

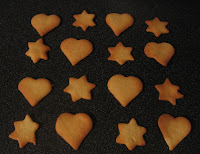
Hearts and stars blankets and biscuits! Recipe from Nigella Lawson's Domestic Goddess Cookbook!

birthday bunting

Here is my homemade bunting. We hung it diagonally across the room and it looked great.


I'll try and make another 6m+ before the next child's birthday as it gave everything a celebratory feel. My youngest loved it and liked looking at all the different flags.

I think there were c29 flags in c8 fabrics.