Showing posts with label make and do. Show all posts

Wednesday, 25 July 2012

Jewellery Holder Tutorial

I have been looking for a jewellery frame holder for a while, to hang my necklaces from, to stop them tangling up.  I found an example of one that was ok from Cox & Cox for £35.  I didn't really want to spend that on something that I wasn't that keen on aesthetically!

So an idea of how I could make one started to come together in my mind.  Yesterday I was out and about and saw a cheap corkboard, and I was off!

Supplies:

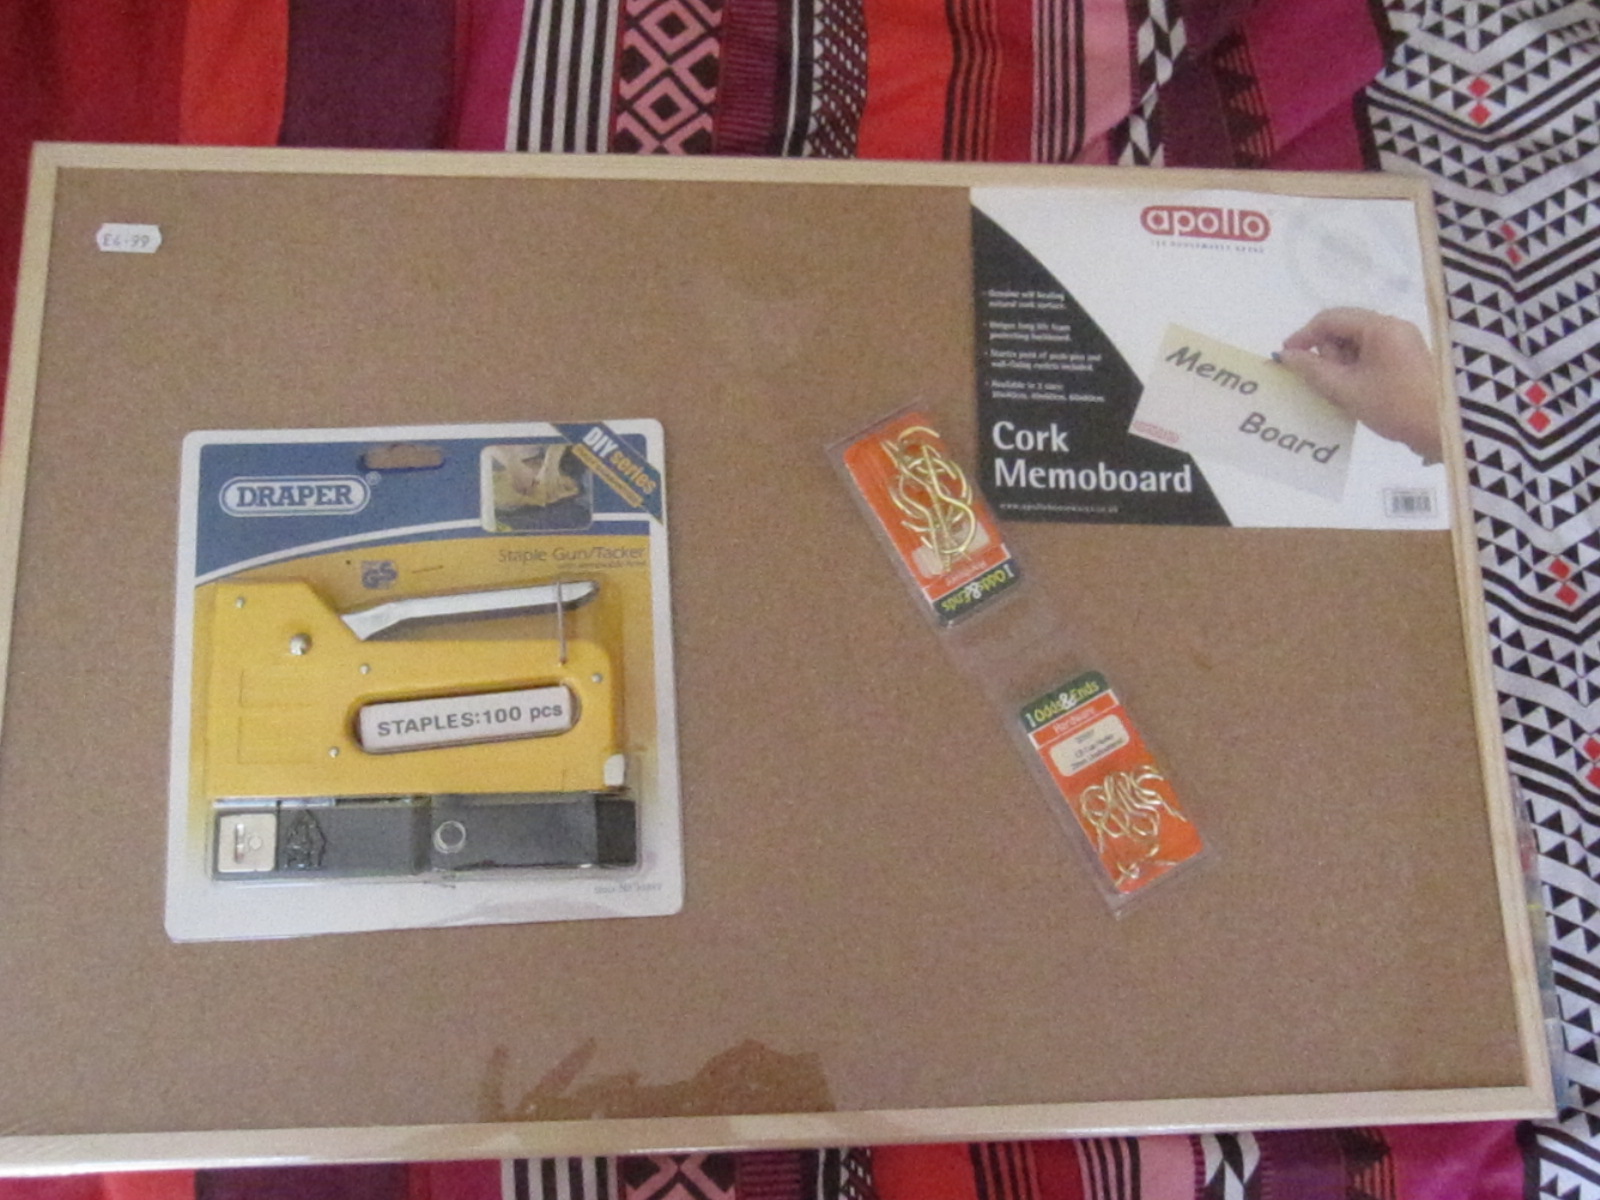
60cm x 40cm Corkboard £4.99 from Burts Homestores,
Staple Gun £4.99 from Robert Dyas
Hooks £3.00 from Robert Dyas
Wadding from stash
Fabric from stash


Cut the wadding a few inches larger on each side of the notice board and firmly staple in place.Pull tight, try not to stretch.


Then attach the fabric (get the right way up) and staple into place firmly all the way around.  Again pull tight, don't over stretch.  If I was doing it again I'd tuck the edges under before stapling.


Close up of staples - see how many I put in.

Front view


Hooks put in (they just screwed in)


Necklaces attached, tangle free, looking alluring!.

I hope you enjoyed my tutorial.  It was really quick to make, under an hour.  I am very happy with how it has turned out.  Please let me know if you do one too.

Tuesday, 24 July 2012

2012 Thank You Totes

I have been making these totes as thank you presents for three years now for my children's class teachers.  This year I went with the following measurements:
Front:
 w: 49cm x h:22cm for the top rectangle.
w: cm x h: 30cm for the two outer bottom rectangles
w:13cm x h: 30cm for the bottom middle rectangle

Back was w:49cm x h:52cm
1.5cm seams throughout 

You can see the front on the picture below:


  I also made some inside pockets.  One was a flat one and the other was a stand out one, I used directions from Lisa Lam's "Bag Making Bible" book.  They were all fully lined.


I went with three colour ways (the teacher's favourite colours) and my children embroidered the hearts.


I hope you like them as much as the teacher's did.  I think these make a great present, and tend to be much appreciated by the receiver.

Monday, 23 July 2012

Beignet ..a long journey!

Many many years ago (three in fact), I bought my first ever Colette Patterns skirt pattern, the Beignet.  I had my new machine, it allegedly did buttonholes like a dream (best not to look too closely at them!), I bought my fabric and I was all set to make this snazzy little number!

The pattern, itself, is a dream to make.  It has brilliantly written instructions, which are very easy to follow.  Sarai has set a very high standard for other independent pattern makers (and the big companies too).

Of course, my sewing standards are not quite as high as they were needed, and somehow, my hemming was atrocious, with a wonky bottom.  So I unpicked it all and put it away!  For THREE years!!!  Oh dear, was it really that long?

Well I have decided in this financially tight time, to get out all my WIP/ UFO and to complete them.  So the Beignet is finally finished.  It is a red linen skirt, for the spring/ summer.  It is fully lined, so it's quite warm,  I will definitely wear it, and I am pleased with it overall!

I also have a few patterns and fabric brought for some projects that I have not made yet.  I will probably try and do those too!

UPDATE:  Sew Magazine are offering the Taffy Blouse from the Colette Patterns Handbook as a free download to print and make

Wednesday, 16 November 2011

falling light

The clocks have gone back and in the 20 minutes since I turned the PC on it's now dark. I caught the last of the day's light to take the photos below. With the cold winter weather coming my mind has turned to warm and snug things to wear. When I came across this book, Northern Lights by Lucinda Guy. I had to buy it as I had fallen in love with the Hulda Pullover and the Twined Socks.

The book takes inspiration from northern European countries Scandinavia, Iceland and the Shetland Isles.

The Hulda Pullover is in the Icelandic section of the book, so I found this shop, and bought my yarn from it.


My yarn came in a dizzying selection of colours, but I followed the exact shades from the book, as that is what makes it, I think.


The reds that go just around the base of the jumper, which lift it.


I love these oh so subtle changes from off white up to black in the yarn selection. This is what makes the stripes so lovely in this jumper with the gradual gradation of colour.


Now have I actually got any time to make it? Not really!

Tuesday, 10 May 2011

the eagle has landed

Time has been running away from me again. After the fun extended break with so many bank holidays, we are now all getting back into our routine of work, school, nursery and home.

Each half term my son's school do a different project. This term it is about the rainforest (so I presume they will do some biology, geography, history etc within the topic). This Friday his class are doing a play about the rainforest. I do have to go to work, but when I saw what they were doing, I booked the morning off. (It's sad when you can't always get to see everything)

Last week, he came home with what he needed to do for the play. Number 1 learn lines, number 2 get an eagle costume together! Oh I do love another job, in our already choc-a-block week. My husband said he would take charge and get it done this week.

So yesterday (Monday) the eldest returned from school saying he needed the costume for today. Plans had to be changed as not all costume materials had been bought.

So with yellow card, that we had from are infamous Daffoldil hat and brown fabrics, left over from my sister's quilt, an eagle outfit was made!


The headpiece was made by my husband.


The wings that I made sewing 4 skinny quarters together, so they would overlap. I then hand cut all the "feathers" into the fabric. Then I hand stitched each wing onto the sleeves of a brown top (purchased for his last school play).


From the front, the graceful eagle still in his pjs.

Wednesday, 13 April 2011

weekend


Last weekend we had some good friends to stay, a wonky witch and a zombie lover! They came to support a family member running in the Brighton Marathon. They have 2 children, their youngest was only born in January.

As a present for the baby, I made him a quilt. I used the left over fabric from my son's Castle Peeps Quilt, and designed a quilt for him.

I can finally do a reveal:

For my son's quilt I used the pattern that Lizzy House made up. For this quilt I was inspired by other Castle Peeps Quilts I had seen on Flickr and other places. I measured all the fabric that I had left over, and designed the pattern so it used up all the fabric. (it was quite a headache due to the lack of peace and quiet in our house)


I didn't have enough fabric to do a traditional binding, so I sewed round the edges with 2 parallel rows of straight stitching. (the batting is enclosed as I sewed it right sides together and then flipped it to the right side out, and then I did the 2 rows of edge stitching.) I chose the diamond quilting design, as I felt that fitted in with the "medieval" look of the fabric.

I am very happy with this quilt.

Here's a reminder of my original quilt (from the Lizzy House pattern) :


I still have my eldest son's quilt to do. I'm not in a rush with that. And I have 2 quilt tops to either stick together or do 2 quilts from (they are from the Midwest Modern fabric range by Amy Butler) again, no rush!

Wednesday, 23 March 2011

wonky witch


A dear friend of ours has recently opened a rather lovely needlecraft e-shop named Wonky Witch.

The cross stitch patterns that she has in stock are really detailed and amazingly intricate and fabulously designed. But if like me, you've never tried it the Wonky Witch team also have some starter kits, which have some really sweet designs like this cute watering can.


Or for the experienced cross stitcher one of these designs from Bothy Threads.


If you have any questions, just send the Wonky Witches an email, and I know Zoe will get back to you very soon. And if you need another blog to read, look no further than here!

Monday, 10 January 2011

castle peeps reveal yourselves!

There are many times (a week) that I plan out a post in my head as I go about my business. This is usually in the chaotic time of getting home from work, picking children up from nursery and school and making dinner and doing some home chores (not exactly a calm environment).

They can range from many different subjects, whatever has caught my attention in the day. It’s probably a good thing that my head is not connected to my blog, otherwise my blog would be very random in deed, and I would probably come across as a mad person, with half baked ideas.

I guess what I am saying is that I want to be able to put together more satisfying posts that say a bit more about me and my life, but it’s very hard to find that silence and solitude in a house with 2 youngish boys and 2 buy working adults. When the silence does come (usually by 8:30pm) I just want to spend some time with my husband.

Last night we had our sofa date night. We watched “A Single Man” the film by Tom Ford. My husband was wearing his Tom Ford glasses, so was perhaps privy to an even deeper understanding of the film. The film was excellent, it showed a depth of human emotion that was so bitter sweet and wonderful.

I also managed to finish my youngest son’s Castle Peeps quilt. The fabric and quilt are designed by Lizzy House.

This has gone on a bit too long. I was aiming to have it done for his birthday, but as the fabric did not arrive until that very day that was impossible.

I’m not as bad as some bloggers (I will not name names in quilting procrastination). I do love it.

Was it a bit unimaginative of me to copy the pattern exactly? Yes, but in my defence, I had so little time to fit it in, I did not have that creative stewing time that is needed for creative quilting. I put it on him last night as he slept. He was very happy with it this morning when I showed it to him.

It has yet to be washed and "shrunk!" I'll do that this week sometime.

Wednesday, 8 December 2010

pretty patchwork

Here is another dolls blanket that I have made from fabric scraps that I have. I used some of the decorative stitches that my sewing machine does.
It looks a bit wonky in the photo, and dark, too many sunless days.


This is the back.


Now onto a quick and fast way to create a patchwork piece of fabric.

The first step is to sew together larger fabric scraps together into a rough square/ rectangular shape:


If this isn't patchworky enough for you, then re chop it up:

Now move the strips around into a pleasing new patchwork design:
Then sew back together:

Now you have an even more intricate patchwork piece.
You can keep chopping it up and resewing it as many times as you like, the only thing to remember is that it becomes smaller with each round.
Use this in projects such as lavendar bags, as a pocket on a bag or apron or in another way you see fit! You could sew a piece of fabric to the back, so it looks neater (there are a lot of seams)

Friday, 3 December 2010

Gift Ideas - Doll's Patchwork Quilt

This is another stash busting gift, a doll's patchwork quilt for my nieces.

I pieced together some of my fabric scraps in three coordinating fabrics. These fabrics had been originally used to make myself an apron, and dresses for my nieces. I had saved the last few bits away, I pulled them out and I literally tried to piece them together like a jigsaw, so I would end up with a rough rectangular shape (c45cm x 35cm). As you can see there is no set design, more crazy paving, if you will.


Once that is large enough. I trimmed it down to a rectangular shape. I them cut out a piece of cheap gingham fabric, I had, to the same size.

sewing batting together


Now for the clever bit, I have sewed together left over batting, from quilts I have already made, again to the same measurements. The way I did this, was to butt them up against each other and join using a zigzag stitch. That means it's a flat seam.

batting all sewn together


I'm not going to bind this, so I am laying the batting down then I lay the two rectangles of fabric right sides together.

Batting, fabric 1, Fabric 2 (rst)

I stitched all the way around, leaving a gap of between 5-8 cms. Turn inside out. Poke out corners. Now whip stitch gap together.

Feel free to quilt the blanket if you like. Make it as simple or as decorative as you desire. Time is probably an influencing factor here. It measures approx 19" x 15".
