The other day I was looking at Soule Mama and Glittergoods and they were inspired by each other with making books for their children to draw/ write in. Daria on GG gave a fantastic step-by-step instructions, that I made some up too.
If you're British then use normal A4 card and paper (from my child's art and craft stash I have built up - so nothing too fancy) and basically cut the A4 card and paper in half, to give you A5 size, (fold this in half, A6,) and stitch it together using embroidery floss. I just used a large needle to pierce the card and paper, which worked just fine. For a neater finish (as Daria says) trim the inside paper down so it doesn't spill out when folded.No 1 child was v happy with his new books just for him. He's only just starting to read and write. You can see how I did it below, but check out Glittergoods for the professional way to go about it!

Needle piercing the card and paper to make holes (just 3 on the spine)

Start in the middle hole going down into the book

Come back out at one of the ends, then bring the needle over to the last hole (the one so far untouched, and push back down into the book.


Bring needle back through central hole.

Tie off ends, and cut.

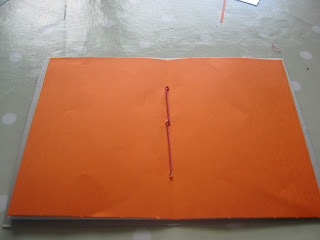
The inside of the book.
job done, v happy and impressed child.
Plus nice to do something in minutes for once!!!


No comments:
Post a Comment