


Materials
Fabric measuring 45cm x 40cm
2kg Rice
Medium Size Freezer Bag
1x 10cm Zip
Draw out your template on tracing paper (it is a t/ cross shape) or direct onto the material with tailors chalk. I use a 2.5cm seam allowance. So the total width is 45cm x 40cm height. I use the offcut of fabric to make a handle. The fabric for the handle is 5.5cm x 15cm.


Step 3
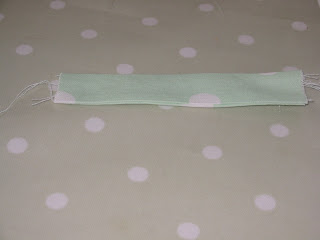
Make the handle. This needs to be 3.5cm wide, once made. Sew the 2 pieces of fabric (5.5cm x 15cm) together, right sides together, with a 1 cm seam allowance. Your parallel rows of stitches will be 3.5cm apart. DO NOT SEW THE NARROW ENDS. Turn inside out, press. 
Step 4
Sew the bottom of the doorstop first. With right sides together, sew in the zip (you don't actually have to have a zip, but as rice is perishable (after quite a few years) you might want the ease of being able to get it out quickly). It is tricky to line up everything correctly, so do take your time.
Only sew the zip for 10cms (the length of the bottom of the doorstop), for ease of cutting etc. Just stitch to the fabric inside the seam lines. (I hope this makes sense) 
 Now sew the other side
 Now, match up a side at at time (working inside out, with the right sides together) to form the rectangular box shape, working from the bottom (where the zip is) upwards.
Step 5
Before you sew up the top, you'll want to insert the handle.
I attach the handle to the top of the material, it should be placed against the right side of the material. Pin in place. Do measure this, to put it in the middle. It should be 3.25cm away from each side. (Remember to ignore the seam, to get the accurate place). Do give a bit of give in the handle, just enough so you can pick it up with your hand.
Step 6
OPEN THE ZIP (so you can turn it inside out)
Sew the top sides together, I tend to sew the handle a few times, to make sure it's well in place.
Step 7
Turn inside out
Step 8
Insert a plastic "freezer/ sandwich" bag into the doorstop. Fill the plastic bag with rice/ beans. Do up zip.
Step 9
Put by your door.
This is the first time I've ever written up instructions for anything that I have designed myself. Depending on comments/ feedback/ plus my own critical feelings I will probably add to this or clarify points to make it better. Please post a comment if it's not working, so I can help you out!


47 comments:
Thank you for the Doorstop Tutorial... I was searching for one, and found your blog... I will try it tonight... Thank you very much... Great Tutorial!!!!... Have a good day :-).. Natalie
Thank you, do let me know how it goes, and if I need to add to the instructions. If you get stuck, or are unsure let me know and I'll clarify it for you. Please send me your photo of your doorstop! Thanks
this is the first website I chanced upon and you have made EXACTLY the sort of doorstop I was hoping to make. Thank you, yours look fab and I have see them in the shops for at least twenty quid!
Hi,
Thanks for that! Have just made one out of some scrap Laura Ashley fabric. A bit fiddly but worth the effort...!
Leonie in Crete, Greece.
Hi,
Wow, I love your doorstop tutorial. I was wondering what size it is in inches? Also how did you get your template for your blog to be the 3 columns.
Thanks again and have a nice day!
Karen, Craftybear, Indiana, USA
also can I link your tutorial to my blog
Hi Craftybear!
10cm x 15cm is roughly 4" x 6", there is approx 2.5cm per inch. But you can scale it down or up depending on the weight and size of your door. I just made a very tall and slim doorstop for my M-I-L's back door.
Of course you can link my tutorial to your blog.
Thank you for your interest.
Claire
The 3 collumn thing, I found on How About Orange's website - I wrote about it here: http://clairesmakeanddo.blogspot.com/2007/10/template-changes.html
http://tips-for-new-bloggers.blogspot.com/2007/02/three-columns-blogger-template.html
Hope that helps
Tutorials are the way forward. Thanks for sharing, and please continue to do so. This is a lovely blog!
Anna
Lovely clear tutorial!
I've just linked to it at Curbly.com, hope that's ok.(Do let me know if it's not!)
Cheers,
Lilybee.
Just found the doorstop tutorial - thank you, it looks great and I am going to make one (or two...) over the holidays.
Has anyone seen a pattern or tutorial for an owl or chicken (or similar) doorstop? I have been searching without much success, maybe someone knows about a book which might help?
Thank you!
omg just finished making my first doorstop, very pleased with myself
Thanks alot for your tutorial only thing that would have made it slightly easier if if there was a picture of you sewing up the seams as wasn't quite sure if I did it correctly Thanks again!!!
Great tutorial. Where did you get that lovely, colourful, stripey fabric? Thks. Meliet.
Hi,
The doorstop tutorial is great. I was looking for a pattern so I could make some of these and sell. I have quite a few vintage style fabrics. Looks like i'm going to be busy!!!
Take care
Tracey
Thank you Tracey. The pattern is for home use really. But if you sell some, that's great.
Having seen other bloggers go through this, the polite thing seems to me, is to ask permission if you can use a pattern for a commercial use. On this occassion I do not mind, as it is for a simple cube shape.
thanks so much for doing this. me & my friend will have fun over the summer making some !! thanks again
Ellie (age 14) x
To Ellie
Have fun making them, have a lovely summer,
Just message me if you get stuck.
kind regards
Claire
excellent, it has inspired me to make a door stop now after thinking about it for ages. Pyramids for me if I can get the square right.
thank you
http://tinyinc.wordpress.com
http://www.folksy.com/shops/tinyinc
I would really like to make a doorstop and draught excluder but cannot find anywhere to buy lavender wheat to fill them. Does anyone have any suggestions?
Have used your tutorial as a basis for making doorstops - mine didnt turn out quite as good as yours, so i opted for sewing each section separately, which worked a treat! thanks for the inspiration though! :)
Thanks for sharing this, that will be Christmas presents sorted this year (assuming they turn out OK!)
Thank you for this tutorial - I made some doorstops and wrote about your tutorial on my blog!
http://looktotherainbow.blogspot.com/2010/03/first-sewing-project-fabric-doorstop.html
Dear Claire:
Your work was fabulous ;but it had an ENORMUS problem
Pease add the sean to the picture.
In the door stop department
We would be eternly grateful.
For me and my mother spent the afternoon triyng desperaly to get it right every time we faled we would laugh ur selves to bits.
Thank-you for a reason to laugh and for putyng it there( for if not we would have nade a big er mess).
From a grateful 11 year old living in spain
ps that's why my english spelling is so bad!!!!
Dear Claire,
Thanks so much for your blog and the door stop pattern!! I have recently "inherited" from my Grandma's sewing machine as she can't use it anymore. It dates back from 1949 and is in tip-top condition and I have used it to make a doorstop for our new house and it worked out perfectly. So came back and had a look at the rest of the blog: great work! Very best of luck for your family,
Julie
Just thought I'd pop back to this post, to thank everyone who has used my tutorial. I'm really glad that most people are able to make it work! Or tweak it to make it usable to them!
When I see similar doorstops for £20-30 in shops, I'm so glad that I took the time out to design and make my own. And 3 years on they are all still working. (Make sure you use a triple stitch for strength!)
This is brilliant, thanks so much for taking the time to write it. I only started sewing three days ago and I have just completed the door stop. Am very, very pleased with myself!
I did find the zip quite tricky and could have done with more detail on how to tuck the end round and sew the other side but other than that, was very clear.
Hello
Can you give me some advice please, I'm attempting to make the doorstop but without a zip - can you help me as to how I can finish the doorstop off ?? I'm a bit stuck !!! Thank you !!
Hi Nikki, I suggest that you sew up all the sides, apart from one of the sides at the top of the doorstop, that way you will be able to turn it the right way out, and fill it wil rice. Once it is filled you can sew it together. As this is heavy, you will want to make sure that your thread is heavy duty (polyester?) and do stitches that are very close together, to ensure strength.
I suggest leaving a side open at the top, as that will have less strain put on it than other seams.
Best of luck!
stumbled on your D.S. tutorial looking for a door draft stop.
Although you door stop isn't what I am looking for it is clearly explained.
Nice work.
Still looking for a door draft stop to cover length of double doors.
........NannyCass
Interesting site, stumbled on your instructions while looking for draft stop for a door.
Although I'm not in need or your particular design I found it very clearly explain.
Nice work.
Still looking for a door draft stopper.
.....NannyCass
Thank you for your kind comments
Thanks for the tutorial. It took me this afternoon to complete my doorstop. I have attached an appliqued felt design to the top face and it looks superb. As a tip for other readers who are daunted by sewing in a zip - I used specialist velcro; available in all haberdashery depts. - simples!
Amanda Jayne
Many thanks - will be making these for Christmas presents!
Thank you for the pattern and tutorial. I was confused about where to put the zipper, then I just decided to use velcro anyways. I have needed a doorstop for a few months. I'm going to fill it with sand and rocks I think. yay and happy new year!
Thanks for this, and for the tip on adding lavender to the filling. What a great idea. Now to find a free moment this weekend!
Thank you soo much for you blog.....I made doorstops for myself and some for christmas presents and friends thought I had brought them! I'll be looking at the rest of your blog for other fab things to make :0)
Thrilled to come across this tutorial. Thank you.
Came across your blog while looking for doorstop tutorials.....love the simplicity of it. Very easy to follow. Will be giving this a go later.....thanks so much for taking the time to map it all out for us.
((hugz)) xx
Great Article, I am going to get on with trying this out.
Cheers, just made 7 for about £1 each, filled with sand from the sand pit. Look really good, works a treat.
I think I'm going to cry but I just can't work this out. You say the 40x 45 cm dimensions includes the seam allowance, but, I've just made a paper template and it looks like I have to add another 2.5cm to the 15cm sides and 10cm edges. Is the finished box 10cm square on top and 15cm on the top. HELP
! sarah
Oh dear,I hope you haven't cried too much! I have used this pattern before so hopefully can help. You need to add 2.5 cm all the way around. If you use the measurements on the template they add to 40cm altogether by 35cm. With the seam allowance all round it will total 45cm by 40cm.
Hope this helps.
Hello Sarah, Apologies for not getting back to you sooner. If you draw out your template without the seam allowances onto a piece of paper (one with cm squares on would be even easier to deal with) and then add 2.5 seam allowance all the way around. When you sew you will have a 2.5cm seam allowance, so your measure doorstop will be w10cm x h15cm x d10cm . If you have any other issues please email me on clairenoake @ hotmail.com and hopefully I can be more helpful. Claire
Brilliant instructions, they are the 1st I've found. Definitely be making some for Christmas pressies. Many thanks
Great tutorial. Easy to follow and go though. How did you find this?
Thanks for this Claire just made this, sans zip, haven't sewed in a while so was a good get into it project. Needs more information on what side to put the handle & how to attach to the side that is closed over. I ad lib'd a bit to get it right.
I have been trying to think how to make a doorstop for ages and this seems a great way. I have just bought some beautiful fabric remnants from www.the-millshop-online.co.uk so will try it out on them!
This could be one specific with the most beneficial blogs Private tutor Bethesda We have ever arrive across on this subject. Really Wonderful. I’m also an expert in this topic so I can understand your hard work.
Post a Comment